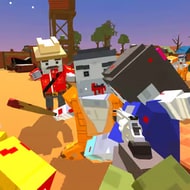








In Zombie Siege Outbreak, you start with a single barricade, limited stamina for dashing, and a horde that only gets faster from the moment the timer begins, which matters more than any weapon you’ll pick up along the way.
| Genre | Survival arcade shooter |
| Core objective | Defend the barricade and survive as long as possible |
| Controls | Move, shoot, and dash using stamina |
| Platform | Browser and mobile |
The Barricade Is the Real Objective in Zombie Siege Outbreak
It’s tempting to treat survival as purely about keeping your own health up, but the barricade has its own health pool, and losing it ends the run just as fast as running out of lives does. Zombies that reach the barricade deal damage regardless of how much ammo you have left, which means positioning to intercept the horde matters more than raw shooting accuracy alone.
New players often focus entirely on personal survival, dodging and repositioning to avoid damage while the barricade quietly takes hits in the background. By the time they notice the barricade’s health bar dropping, it’s often too late to recover, since a handful of unblocked hits can undo several minutes of otherwise clean play.
Balancing personal safety against barricade defense is the core tension the whole game is built around, and it’s what separates players who chase a high score from players who simply survive as long as possible without ever climbing the leaderboard.
Regular Zombies, Tank Zombies, and Jumpers
Three enemy types define how a run plays out. Regular zombies are the baseline threat, slow enough to plan around and predictable enough that most deaths in the early game don’t come from them directly. Tank zombies take three hits to bring down and deal triple damage to the barricade if they connect, which makes them the priority target the moment one appears on screen, even if it means temporarily ignoring closer, weaker enemies.
Jumpers ignore obstacles entirely and move in a straight line, which means the usual dodge patterns that work against regular zombies won’t save you from one closing distance fast. Players who treat every zombie type the same way tend to burn through ammo inefficiently, wasting shots on regular zombies while a tank zombie closes in on the barricade unchallenged.
Community shorthand for a wave that spawns a tank and a jumper together is a “double threat,” and it’s widely considered the moment where a run either holds together or collapses.
Dash Timing and Stamina Management
The dash is a limited resource, not a panic button, since stamina drains with use and doesn’t refill instantly. Using it too early on a regular zombie leaves you without an escape option when a jumper appears moments later, which is a mistake even experienced players make once the horde gets chaotic and decisions have to happen fast.
- Save dash charges for jumpers rather than regular zombies whenever possible
- Watch your stamina bar before committing to a dash near a crowded section
- Use short repositioning dashes instead of long ones when stamina is already low
Ammo, Reloads, and Efficient Shooting
Ammo isn’t unlimited, and running dry mid-horde with no supply crate nearby is one of the fastest ways a promising run falls apart. Efficient players fire in short, deliberate bursts aimed at whichever enemy poses the biggest immediate threat, rather than holding the trigger down on the nearest target regardless of type. Wasting shots on a regular zombie that was never going to reach the barricade in time is a habit that costs runs later, once ammo scarcity actually starts to matter.
Reload timing also interacts with dash stamina in a way beginners rarely consider, since reloading while stationary leaves you exposed exactly when a jumper is most likely to close the gap.
Supply Crates: High Risk, High Reward
Supply crates drop periodically and cycle through different effects, but not every drop helps you, which is what makes grabbing one a genuine gamble rather than a free bonus. Cautious players sometimes avoid crates entirely once they’ve been burned by a bad drop, missing out on the repair kits and ammo restocks that make later waves survivable.
This is one of the more divisive parts of Zombie Siege Outbreak among players: some see the randomized crate effects as a fair risk that rewards bold decision-making, while others feel a badly timed negative drop can end an otherwise well-played run through no fault of the player. Both opinions show up regularly in player discussions, and neither side has really settled the debate.
How the Siege Escalates Over Time
As the run continues, the horde grows faster and the sky darkens, a visual cue that the difficulty is about to spike again. By the time the barricade has taken a few hits, the pace of incoming zombies rarely gives you time to fully recover positioning, which is when tank zombies and jumpers arriving together become the real threat rather than sheer numbers.
Players chasing a spot on the survivor leaderboards tend to treat each escalation point as a checkpoint, mentally resetting their strategy rather than trying to carry the same positioning that worked in the earlier, slower waves.
What’s the biggest mistake new players make in Zombie Siege Outbreak?
Ignoring the barricade’s health in favor of personal survival. Tank zombies deal triple damage to the barricade specifically, so letting even one or two through unchallenged can end a run that otherwise felt under control.
Should I always grab supply crates when they drop?
Not always. Supply crates are high-risk, high-reward, and while repair kits and ammo restocks are valuable, a bad drop can cost you more than skipping it entirely, especially mid-horde when you’re already stretched thin.
How do you deal with jumper zombies specifically?
Jumpers ignore obstacles and move in a straight line, so the dodge patterns that work on regular zombies won’t help. Prioritizing a dash or a direct shot before one closes distance is usually the safer call, especially when a tank zombie is already demanding attention elsewhere.
Zombie Siege Outbreak stays tense because the barricade never stops being the thing you’re actually protecting, and once a tank zombie and a jumper arrive in the same double threat wave, the difference between a high score and a quick restart comes down to whether you defended it or just yourself.