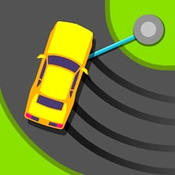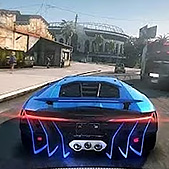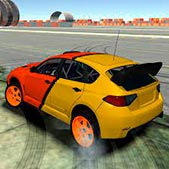








A single space bar is the entire control scheme in Sling Drift, and that’s not a simplification for beginners — it’s the whole design. Every drift marker, every pivot point, every near-miss with the track edge comes down to one hold-and-release timing decision, repeated for as long as you can keep the car on the road.
| Genre | Endless drifting |
| Controls | Hold to sling, release to exit |
| Currency | Gems, used to unlock cars |
| Cars Available | Around 30 unlockable |
The Sling Mechanic and Why Release Timing Matters More Than the Hold
Holding space attaches your car to a pivot point at the upcoming corner, swinging it around the bend in an arc instead of steering through it directly. Most new players focus entirely on when to press — when to start the drift — but the release is where runs actually fall apart. Release too early and the car flings off at an angle that clips the track edge; release too late and the swing overcorrects into the opposite wall.
The drift markers brighten right before a corner as a timing cue, and reacting to that brightening rather than to the corner shape itself is the single biggest habit change that separates a short run from a long one in Sling Drift. Players who watch the road surface instead of the marker tend to react a beat too late, because by the time a corner is visually obvious the ideal release window has already passed.
There’s also a rhythm component that only shows up after a few dozen corners. Consecutive turns in the same direction let you carry speed from one sling straight into the next, while alternating left-right sequences force a full reset of momentum between them. Recognizing which pattern is coming, from the shape of the upcoming track alone, is what separates players chasing a personal best from players just reacting corner by corner.
Gem Collection Versus Clean Lines
Gems scattered along the track fund new car unlocks, and they’re positioned along the ideal drift arc more often than not — which means chasing them usually doesn’t cost you speed the way detours do in other runners. The tension shows up on tighter corners, where a gem sits slightly outside the safest swing radius, forcing a real choice between a longer run and a faster gem count.
- Gems on the inside of a corner are almost always safe to collect mid-swing
- Gems positioned near the track edge require a wider, riskier arc
- Ignoring gems entirely is a valid strategy for players focused purely on distance
Long-term players tend to settle into one of two habits: gem-focused runs where unlocking the next car matters more than the current run’s length, or distance-focused runs where every gem outside the safe line gets ignored on principle. Neither approach is wrong, but mixing the two mid-run is usually where mistakes creep in, since it means constantly recalculating the swing radius instead of committing to one plan for the whole track.
Choosing a Car and What Actually Changes
Unlocked cars aren’t purely cosmetic — different models handle the sling arc with slightly different weight, which changes how forgiving the release timing feels. Heavier cars swing wider and punish late releases less harshly, while lighter models cut a tighter arc but demand more precision from the player holding the button.
Community opinion is split on whether this actually matters at a competitive level or whether it’s a minor feel difference dressed up as progression — a debate that comes up often around which car is “objectively” fastest for long-distance runs. What most experienced players agree on is that switching cars mid-session, right after unlocking a new one, tends to tank a run simply because the muscle memory built around one car’s swing weight doesn’t transfer instantly to another.
New unlocks are worth testing on a short, low-pressure run before attempting a personal best with them. The difference between a light and a heavy car is small on any single corner, but it compounds noticeably over a long endless stretch.
What New Players Get Wrong in Sling Drift
The most common mistake is treating the game like a steering-based racer and trying to make small in-air corrections mid-swing. There’s no steering once you’re attached to a pivot point — the only input that matters is when you let go. Fighting the swing rather than committing to a clean release almost always ends in a wall clip.
A second common mistake is holding the button through multiple corners in a row, expecting a longer hold to mean a bigger, more controlled swing. In practice, one hold maps to one pivot point, and trying to chain corners with a single extended press just produces an unpredictable arc that rarely lines up with the actual road.
Beginners also tend to panic-release the instant a wall looks close, even when the swing was tracking correctly. Trusting the arc through the last third of a turn, rather than bailing early out of nerves, is a habit that takes deliberate practice to build.
- Why do I keep clipping the wall on tight corners? Late release is the most common cause — try letting go the instant the drift marker peaks brightness rather than waiting for the corner to visually straighten out.
- Does the car I choose actually affect my drift? Yes, heavier cars have a wider, more forgiving swing radius, while lighter ones require tighter release timing but can cut faster lines.
- Is chasing every gem worth the risk? Only on wide corners — gems near the track edge on tight bends usually aren’t worth widening your arc for.
Sling Drift is short on complexity by design, and that’s exactly what makes the release timing feel so worth chasing — one clean corner into the next, gem after gem, with nothing standing between you and the track edge except how well you’ve learned to let go of that pivot point at the right instant.